Disaster Recovery Reference Architecture in Azure
Prerequisites
This guide assumes that a few basic components already exist in your Azure subscription:
-
A private VNet where the load balancer and virtual machines will be created
-
A point-to-site or site-to-site VPN to this VNet to provide access to the virtual machines during setup
-
A NAT gateway to provide outbound internet access to the VMs for installation and updates
If any of these components are missing, they will need to be created before proceeding with this 12Port disaster recovery setup.
Load Balancer Creation
First, we will configure the load balancer that will forward web connections to 12Port and control the switching of traffic between the primary and backup nodes during failover events. Start by creating a new Azure Load Balancer in your subscription. Configure the settings on each page as described below:
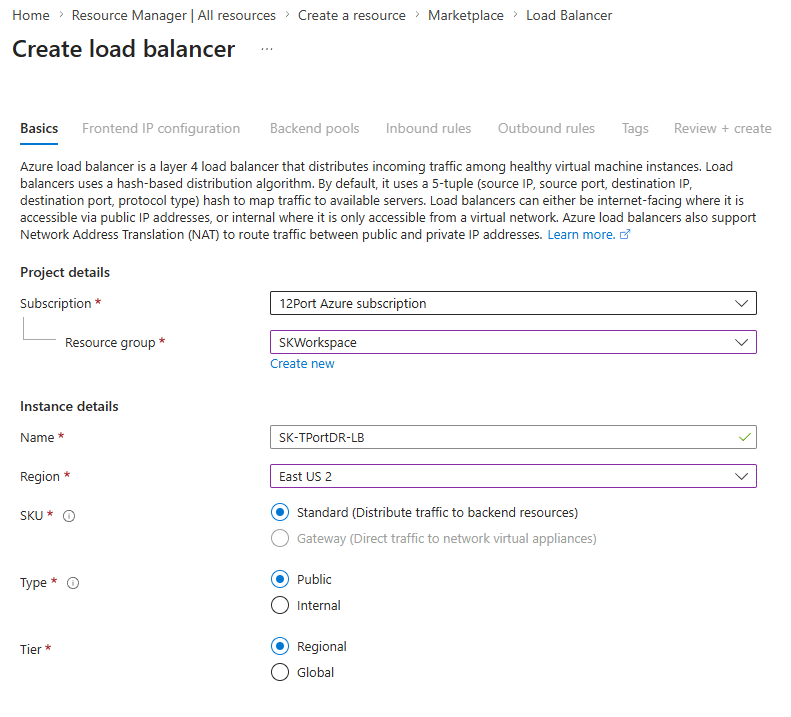
Basics
In Region, choose the region where your VNet is located. Choose "Standard" as the SKU, and choose either "Public" or "Internal" depending on whether you would like your 12Port deployment to be reachable from the public internet.
Frontend IP Configuration
Click Add a frontend IP configuration and create an IP configuration with a new or existing public IP address.

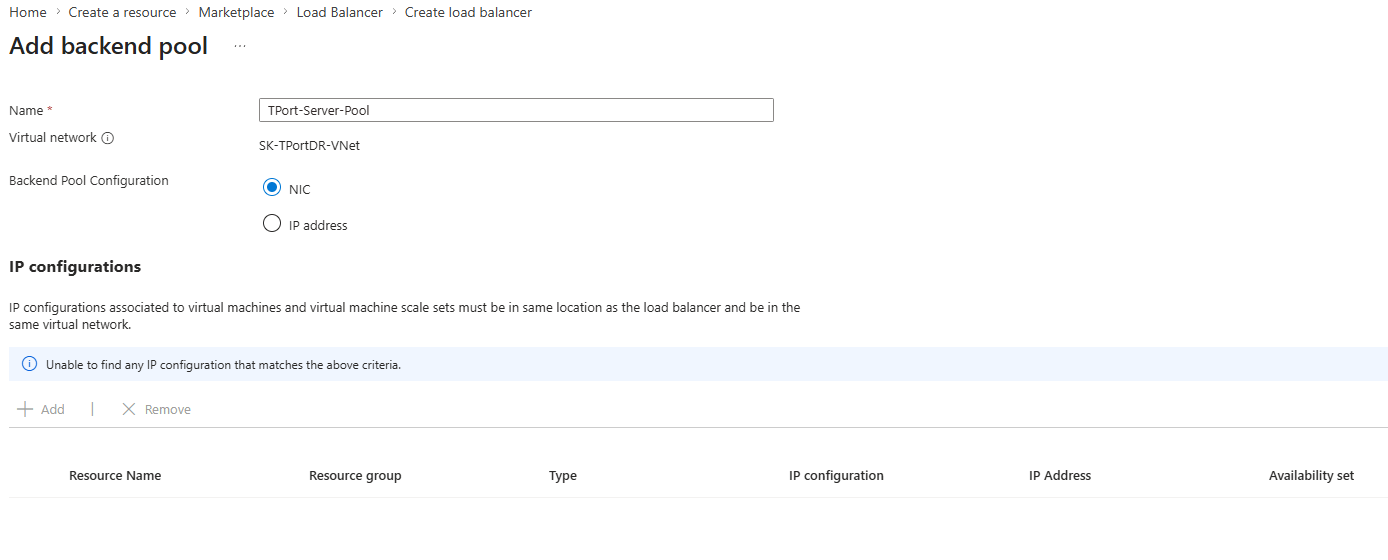
Backend Pools
Click Add a backend pool. Create a backend pool where the 12Port server VMs will sit.
Inbound Rules
Click Add a load balancing rule. Choose the frontend IP and backend pool created in the previous steps. Select TCP for the protocol and enter "443" and "6443" for Port and Backend port respectively. Enable session persistence with the "Source IP" option.
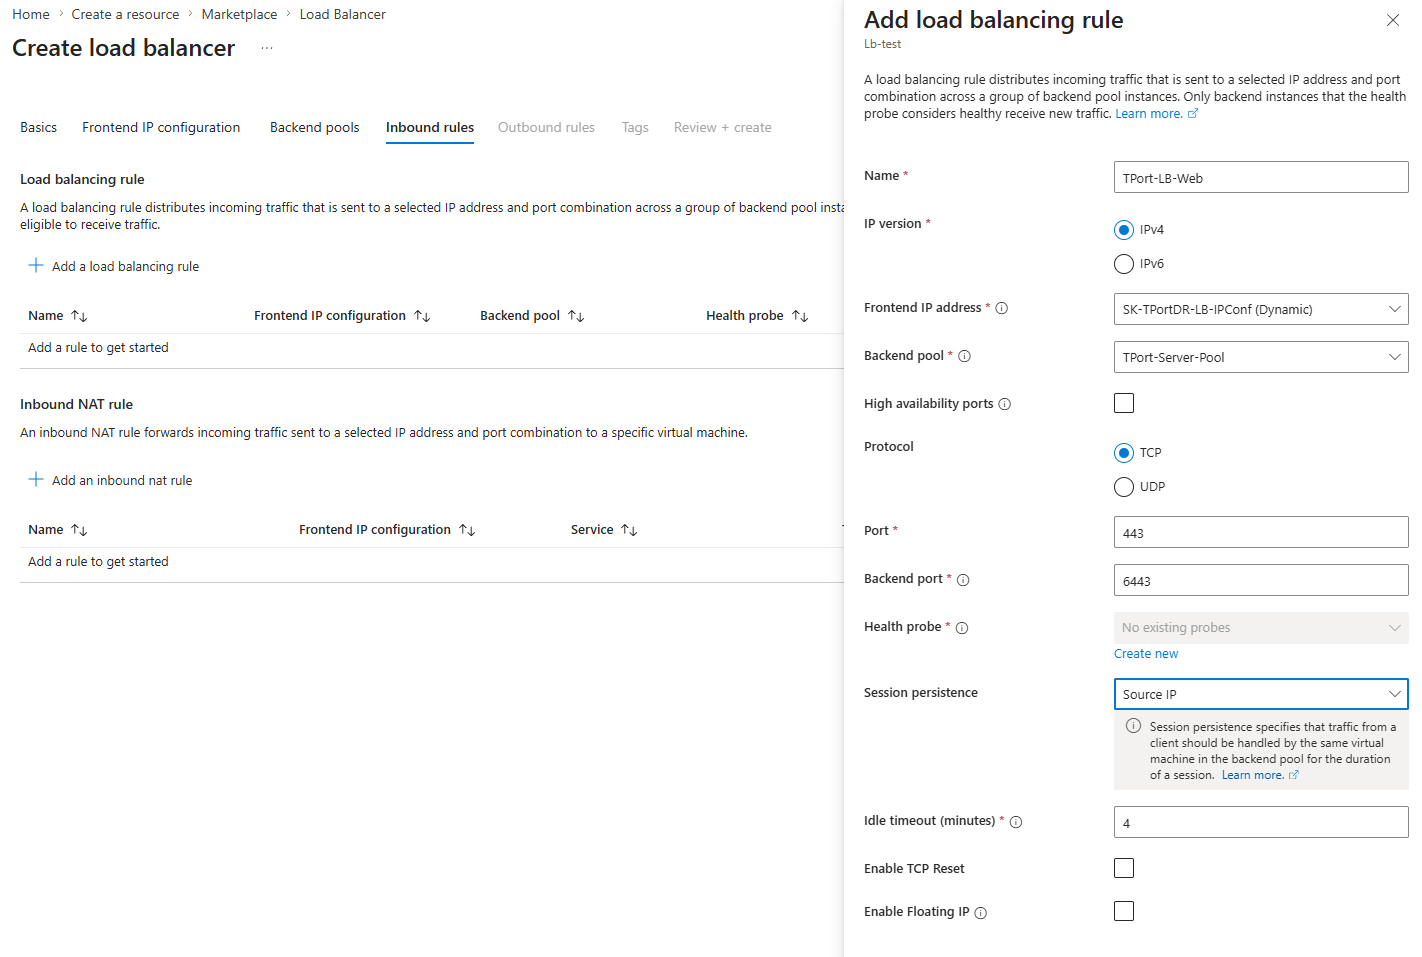
In this load balancing rule, create a new health probe. Copy the configuration shown below, replacing "dev" in the URL with the name you plan to use for your 12Port tenant.
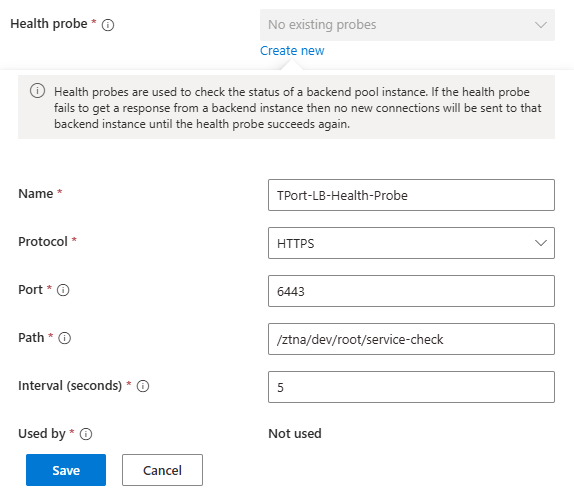
Review the configuration and click Create once you have verified everything.
Virtual Machine Creation
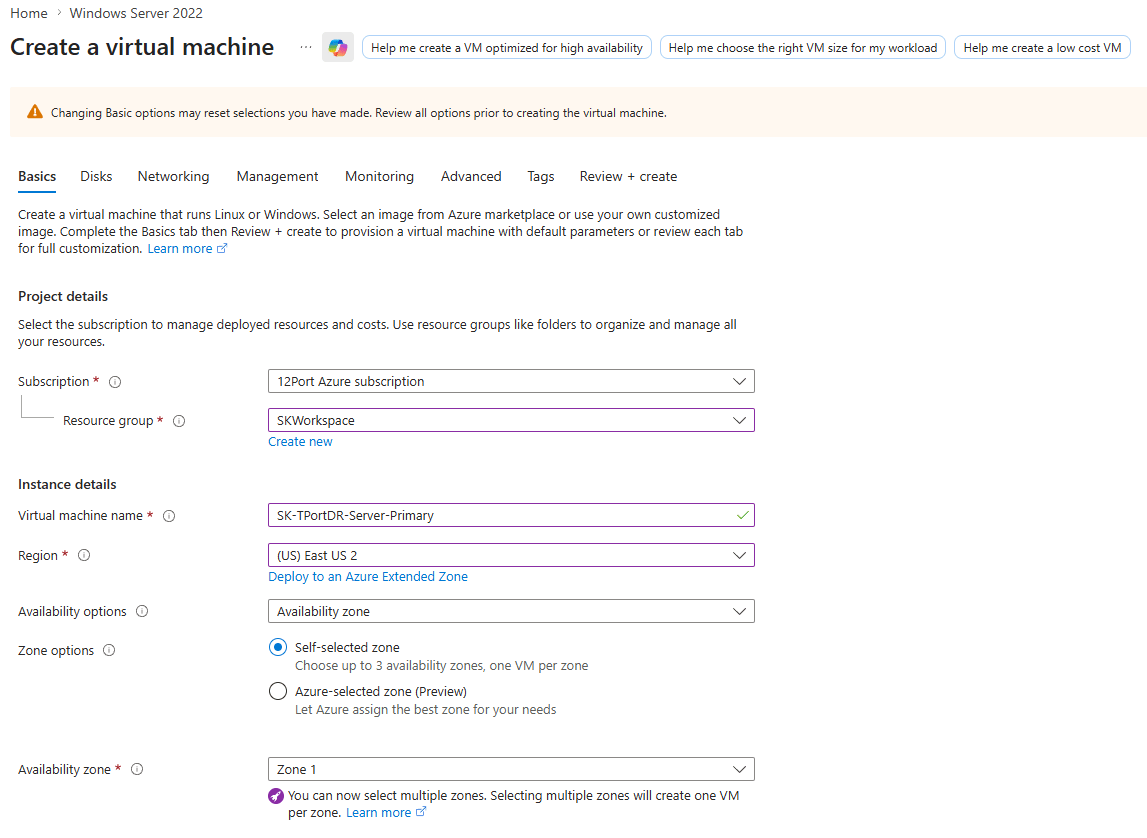
Now, we will create the two virtual machines that will serve as the primary and backup nodes in the DR setup. Start by creating a virtual machine for the primary node. Most settings can be chosen based on your preferences, though you should consider the supported operating systems and minimum hardware specifications as listed in the System Requirements. There are also a few places where you will need to choose specific settings to properly connect the VM with the other components in the DR setup:
Basics
In Region, choose the region where your VNet is located. For the availability options, choose "Availability zone", check "Self-selected zone", and choose one of the zone numbers. Choose "None" for Public inbound ports as we will not be giving the VMs public IP addresses.
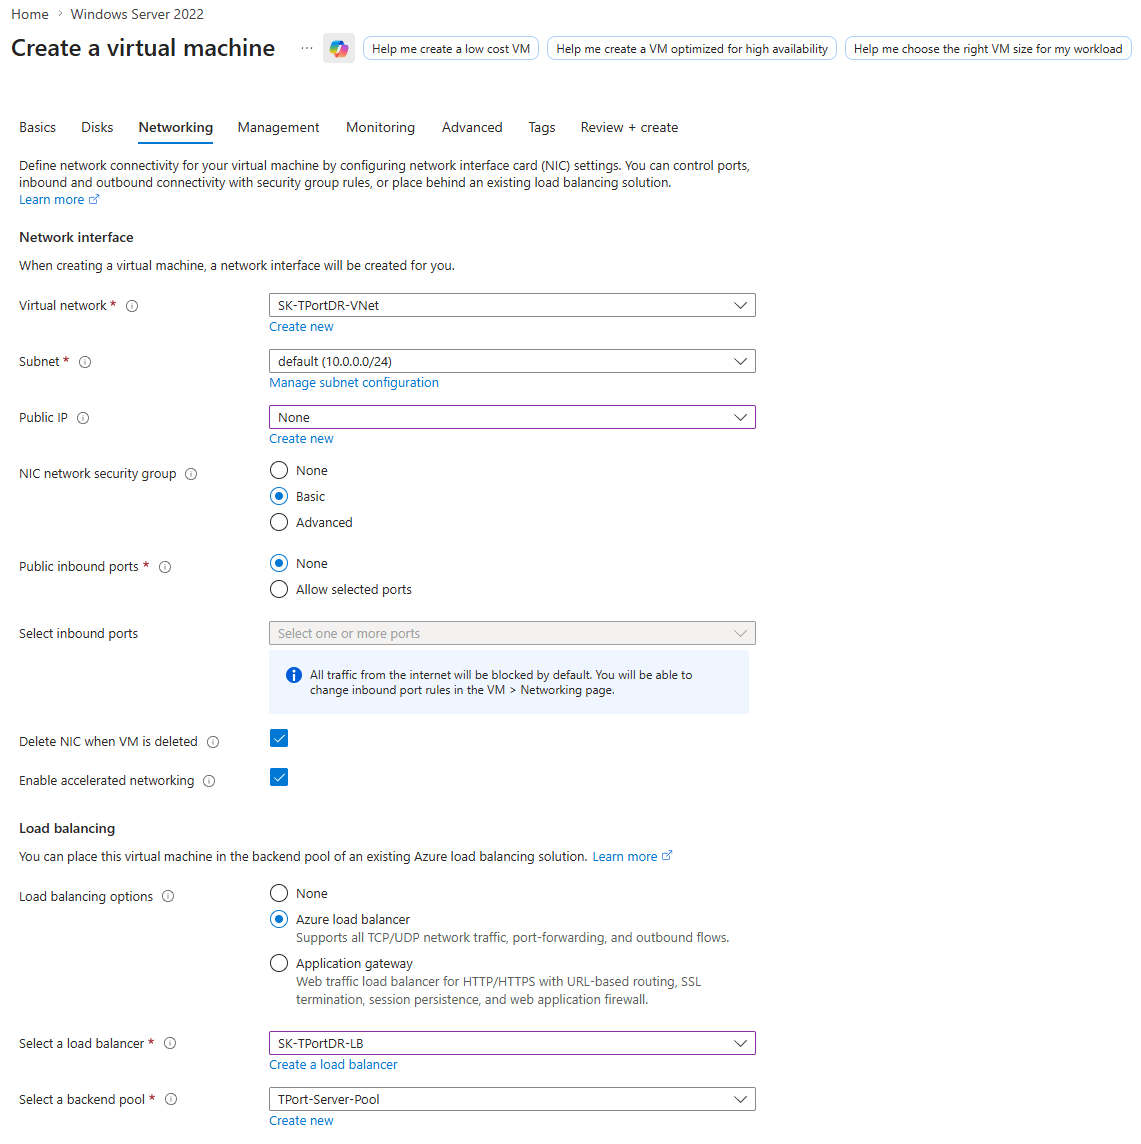
Networking
In the Load balancing section, chose "Azure load balancer" and select the load balancer and backend pool created in the previous step.
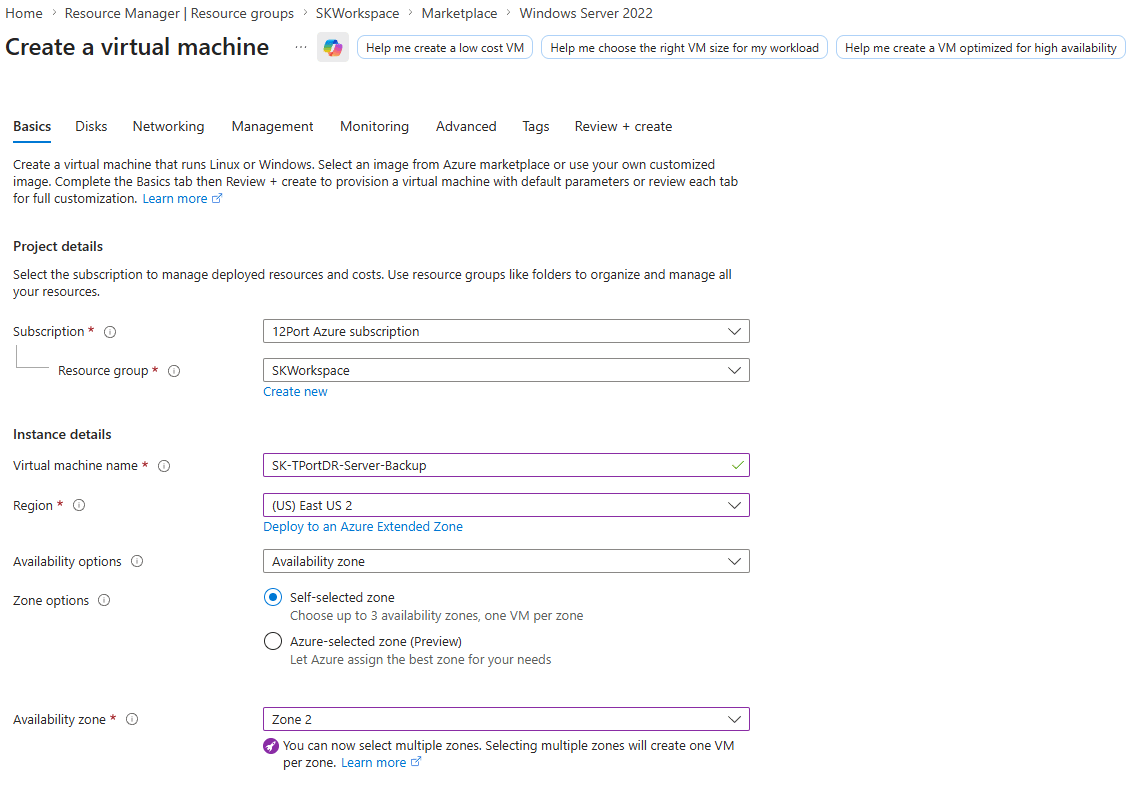
Once the VM is deployed, repeat the procedure to create a second VM for the backup node. Make sure to choose a different availability zone on the Basics page to ensure the DR architecture is zone-redundant.
Install 12Port on each VM by following the Installation Guide. If installing on Windows, make sure to create a firewall rule on each server to allow inbound TCP connections on port 6443.
Replicated Tenant Initialization
In order to use node-to-node replication, both nodes must start from the same replicated tenant. To do this, we will create a tenant normally on the primary node, set up a few configurations, and create a backup that will be used as the basis for the tenant on the backup node.
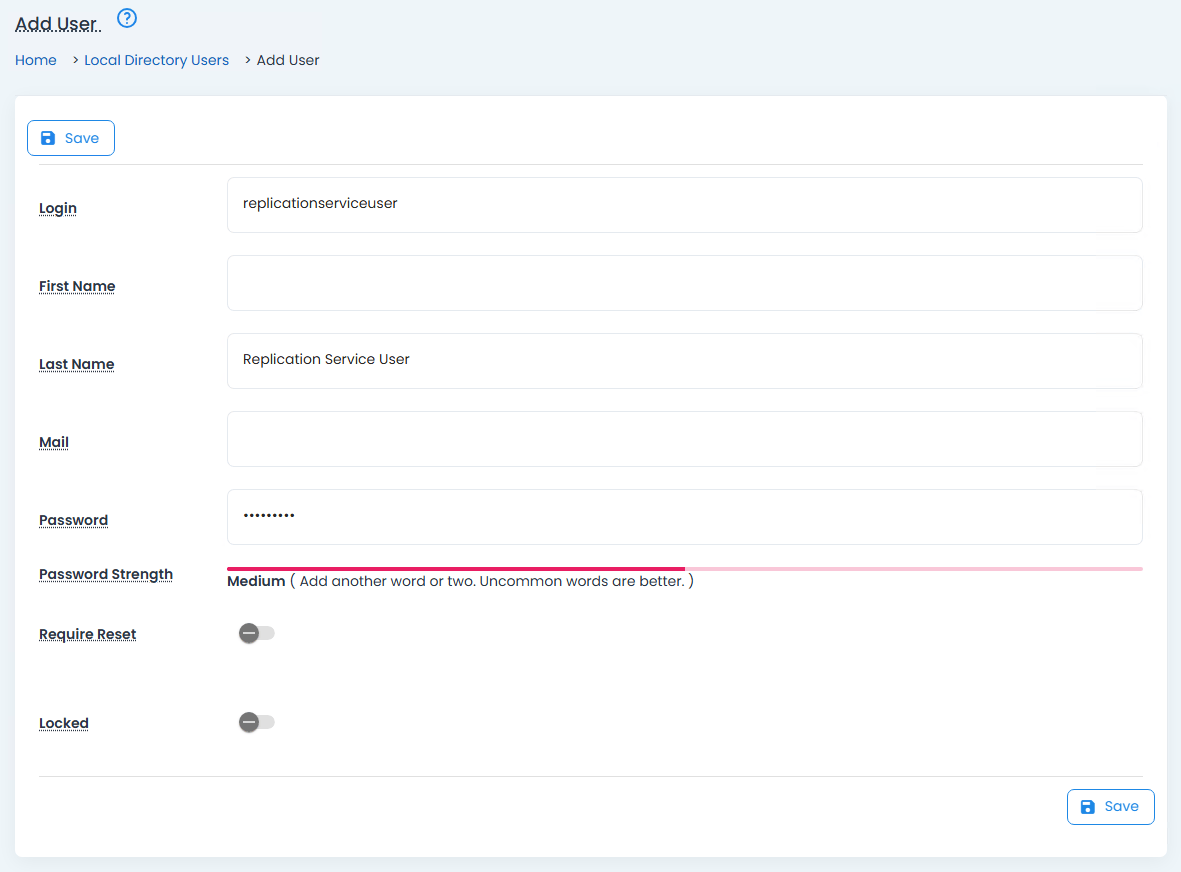
First, log into the web console of the primary node. You will be prompted to create a global admin and the initial tenant. In the tenant configuration, make sure to choose "Create Standalone" for Tenant Update Type and "Embedded" for Database. Once the tenant is created, we need to create a service user to handle the node-to-node replication. Start by adding a new user in Management > Users. Name it something like "replicationserviceuser".
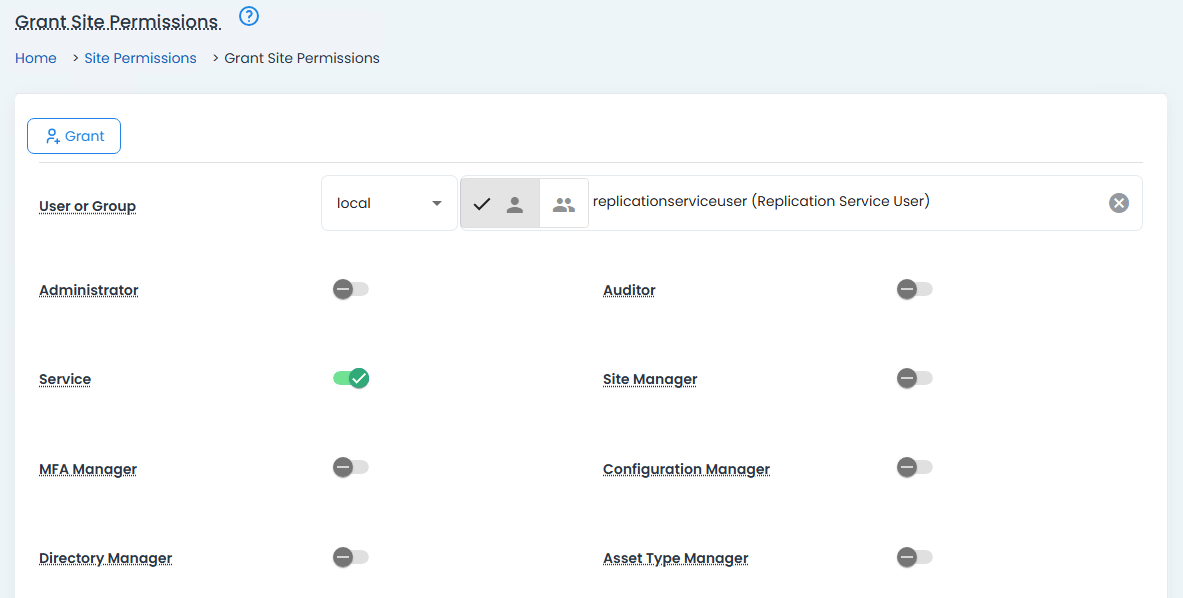
Navigate to Management > Site Roles and click Grant. Search for this new user, check the Service role, and click Grant.
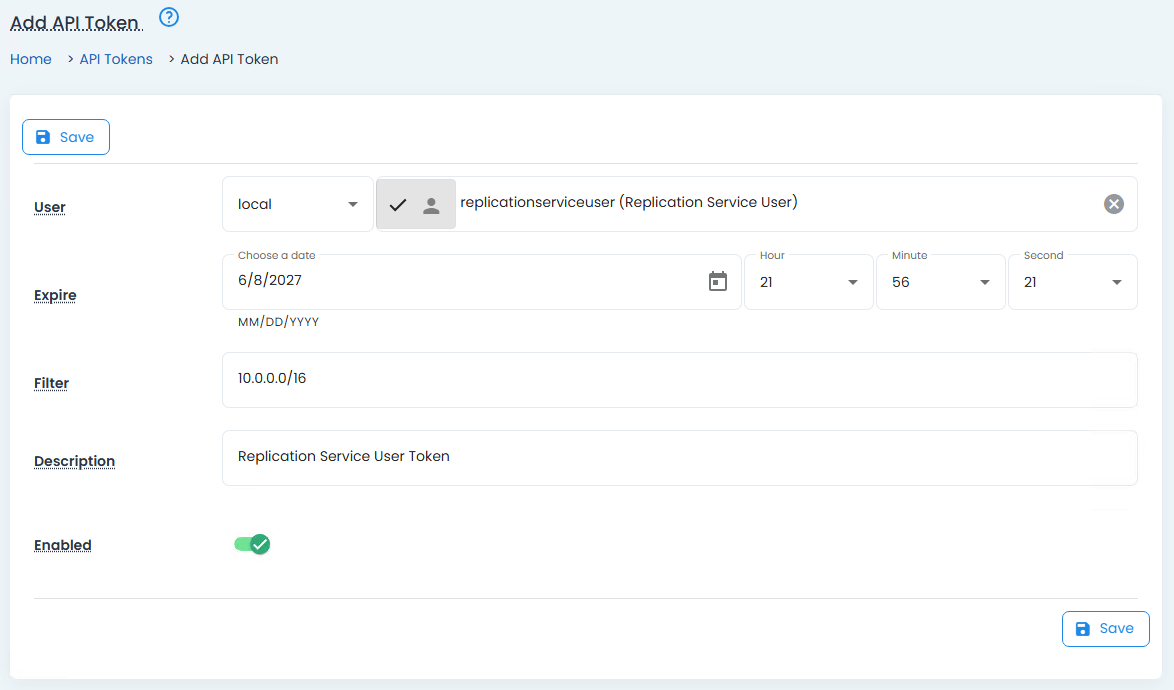
Finally, navigate to Management > API Tokens and click Add. Search for the replication service user, choose a long expiration window, and optionally enter a CIDR in Filter so that the token can only be used from inside the VNet. Click Save, and copy the generated API Token for later.
Note
It is strongly recommended to also create a local tenant administrator at this stage. Replication in 12Port occurs on a per-tenant basis, and the global administrator created during node setup exists in the scope of the unreplicated base tenants. Even if the global administrators on each node have the same username, they are treated as separate users which often causes synchronization problems. Avoid accessing a replicated tenant with the base tenant global administrator whenever possible.
We are now ready to replicate this tenant to the backup node. To do this, we must create a backup of the tenant on the primary node to copy to the backup node. Navigate to Configuration > Backup and click Start Backup.
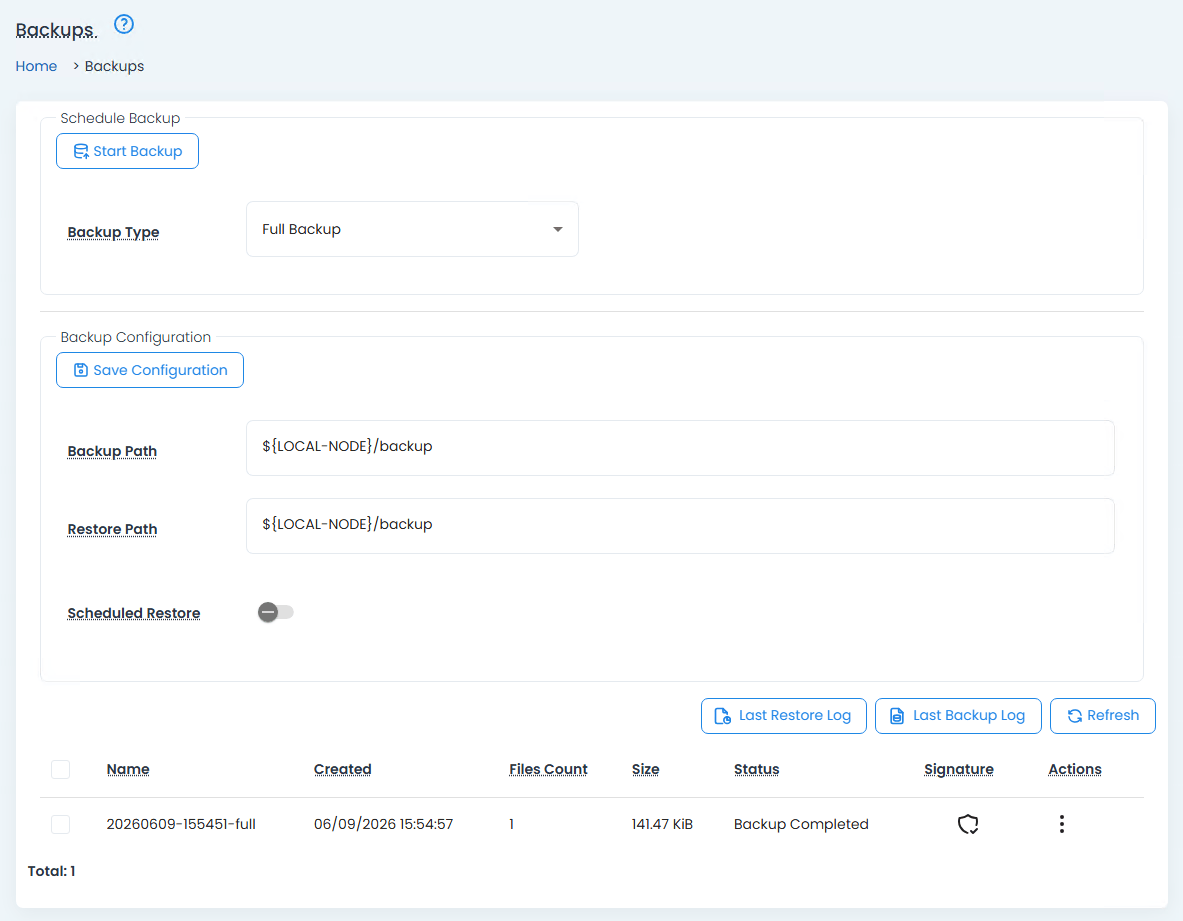
Once the backup is complete, you will find the files in $HOME/backup/
Finally, access the web console of the backup node. Create the global administrator and configure the tenant as shown below:
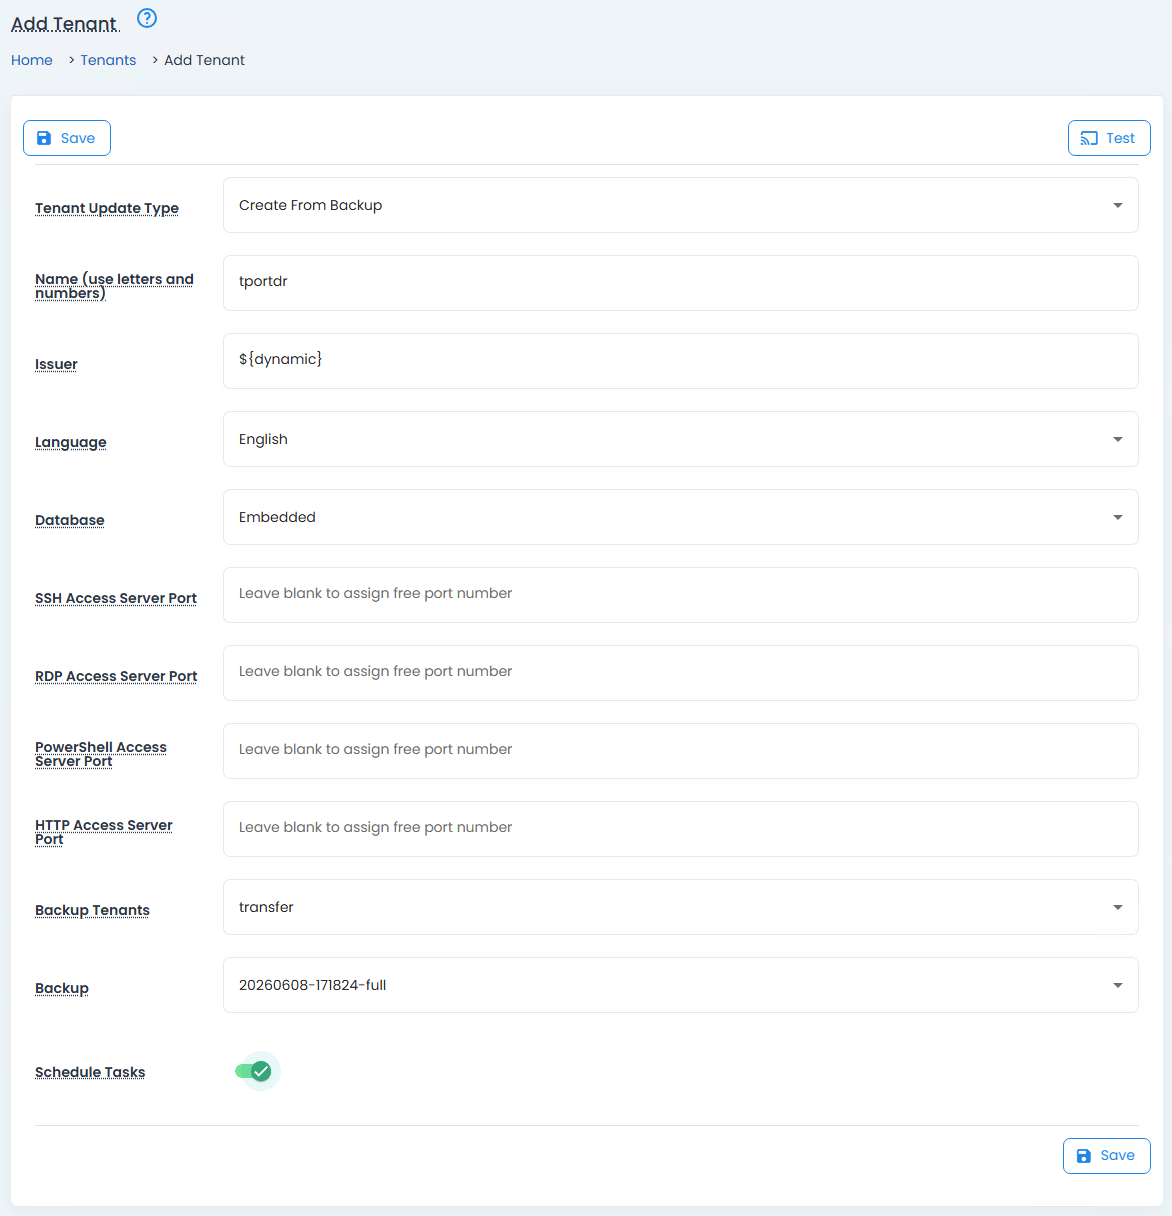
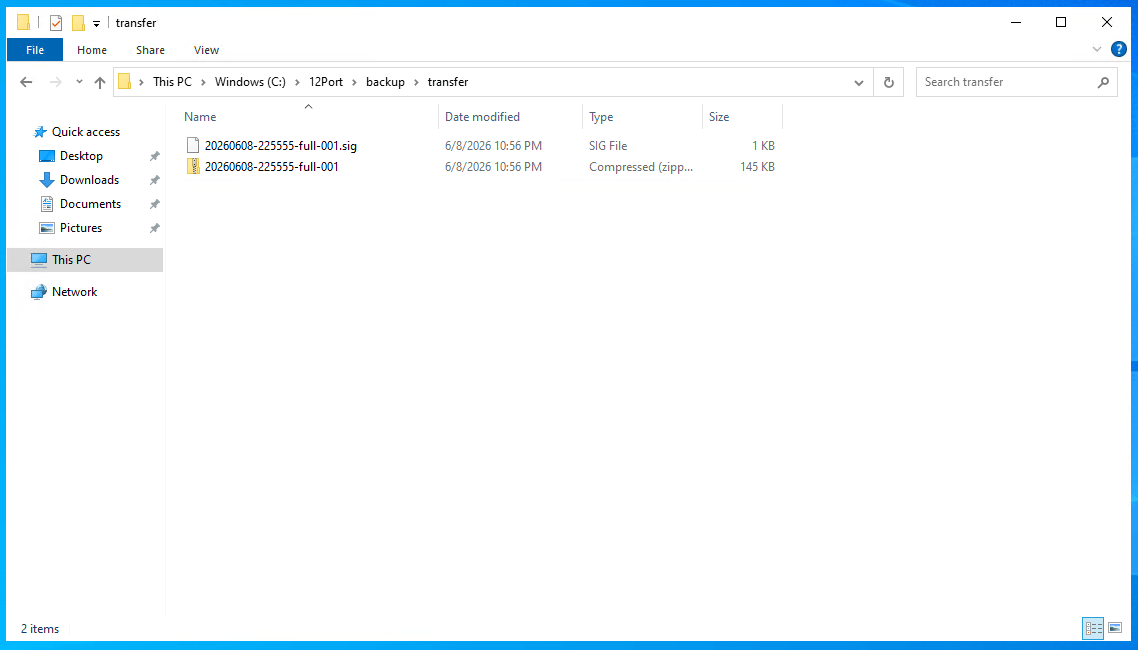
If "Create From Backup" does not appear as an option in the Tenant Update Type dropdown, click Cancel and reenter the tenant creation screen by navigating to Management > Tenants and clicking Add. Make sure the tenant name is identical to the tenant created on the primary node. If you assigned custom ports for any of the proxies, these will also need to be identical. Choose "transfer" for Backup Tenants, select the name of the backup you transferred, and check Schedule Tasks. Finally, click Save to begin creating the tenant from the restored backup.
Replication
Now that replicated tenant has been deployed across both server nodes, the replication strategy can be configured. We want bidirectional replication for disaster recovery. Writes to the primary node should be pushed to the backup node so that everything is up to date at the time of failover, and writes to the backup node should be pushed to the primary node so that no new changes are lost on failback. This will require a similar replication configuration to be created on each node.
On the primary node, navigate to Configuration > Replication and click Add. Complete the replication configuration as shown below:
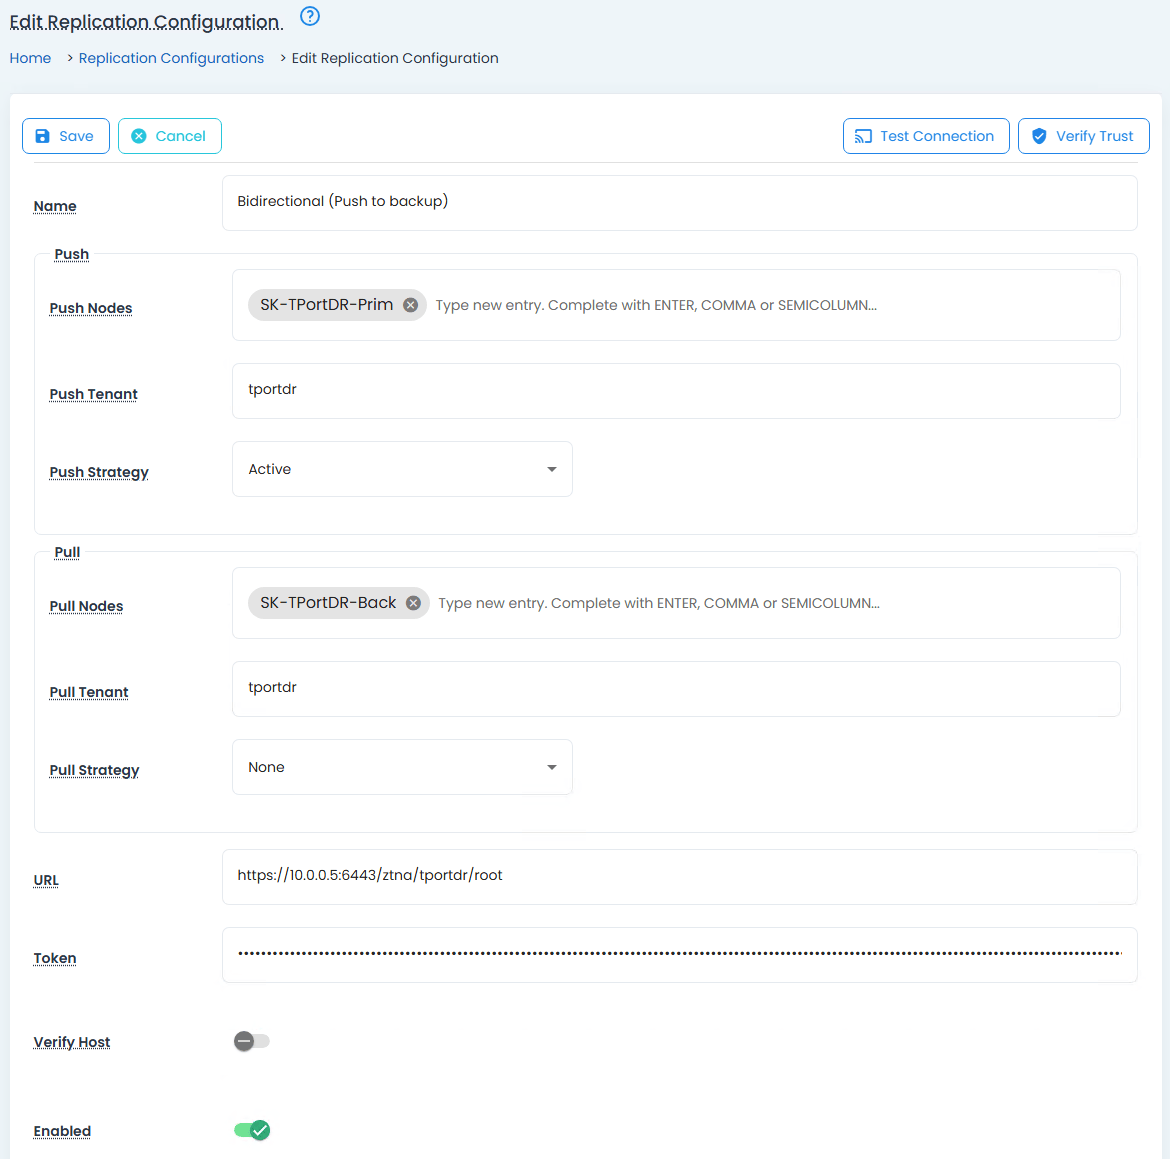
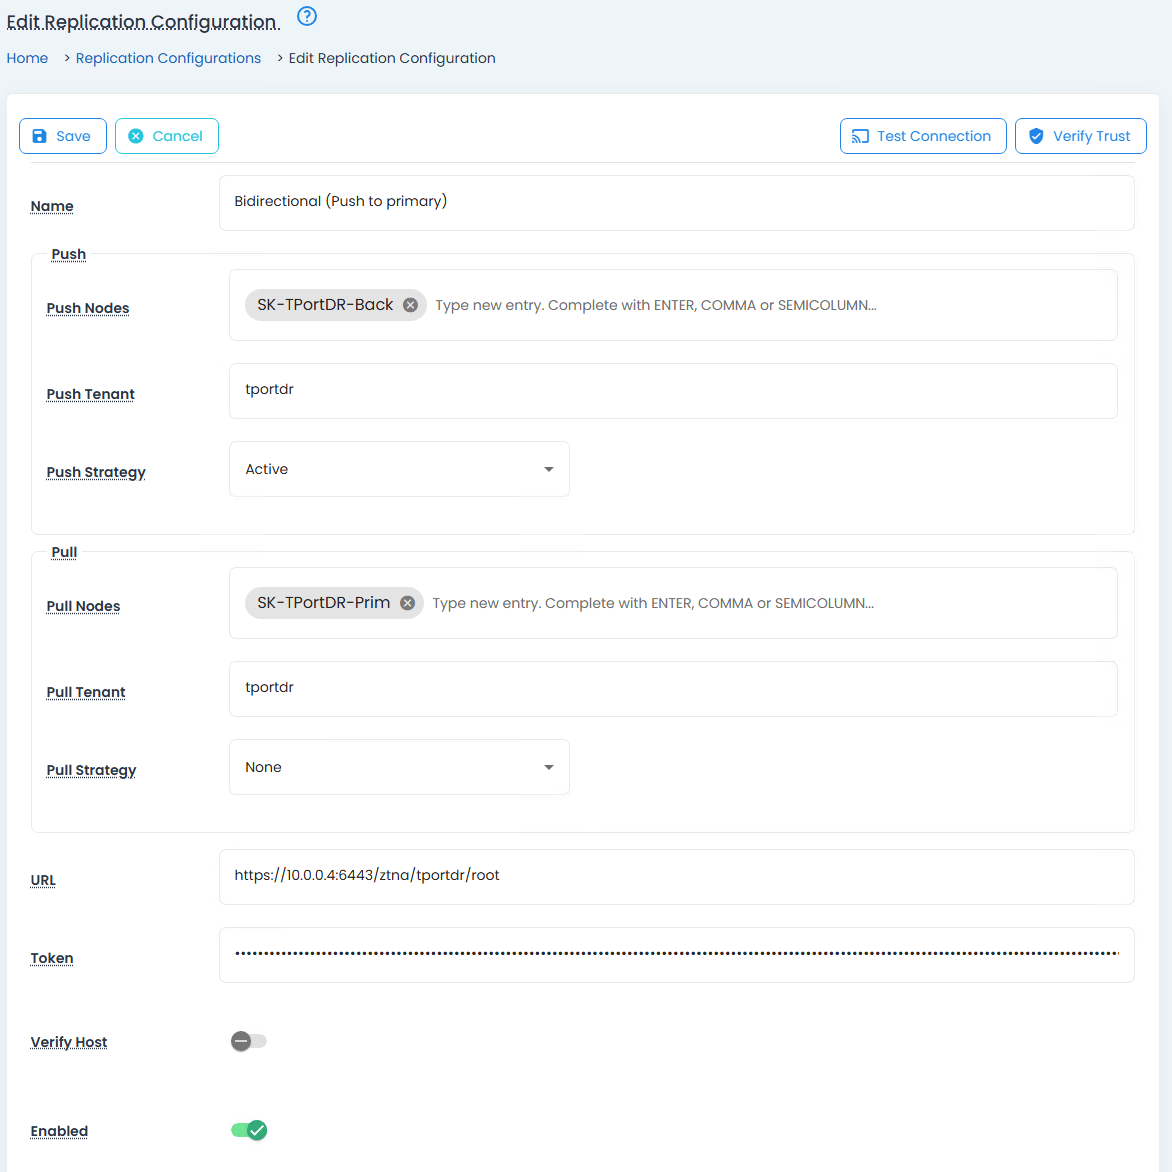
Note that Push Nodes and Pull Nodes should be the hostnames of each server as they appear in My Profile > About. Token is the REST API token we generated for the replication service account in the previous step. If you are using a self-signed certificate, click Verify Trust in the top right of the page. If you are using an IP address instead of a hostname in the URL, you should also uncheck Verify Host. Create a similar configuration on the backup node, but swap the hostnames and URLs:
Once the replication configuration is complete on the second node, you can test the configuration by clicking Test Connection in the top right. You should see a success message if everything has been configured properly.
Disaster Recovery Health Probe Override
Many load balancers have built-in priority routing controls that allow the designation of a backup node in the backend which will receive traffic only when the primary node is unresponsive. This is the desired behavior for a disaster recovery architecture, but it is not natively supported by the Azure Standard Load Balancer. However, 12Port has a health probe override feature that allows the backup node to be aware of the higher priority primary node and give a "service unavailable" response to health probes as long as the primary node is alive. Using this feature, we can achieve proper active-passive load balancing for disaster recovery even without priority routing in the load balancer.
To configure this behavior, log into the web console of the backup node, navigate to Configuration > Peer Nodes, and click Add. Complete the peer configuration as shown below:
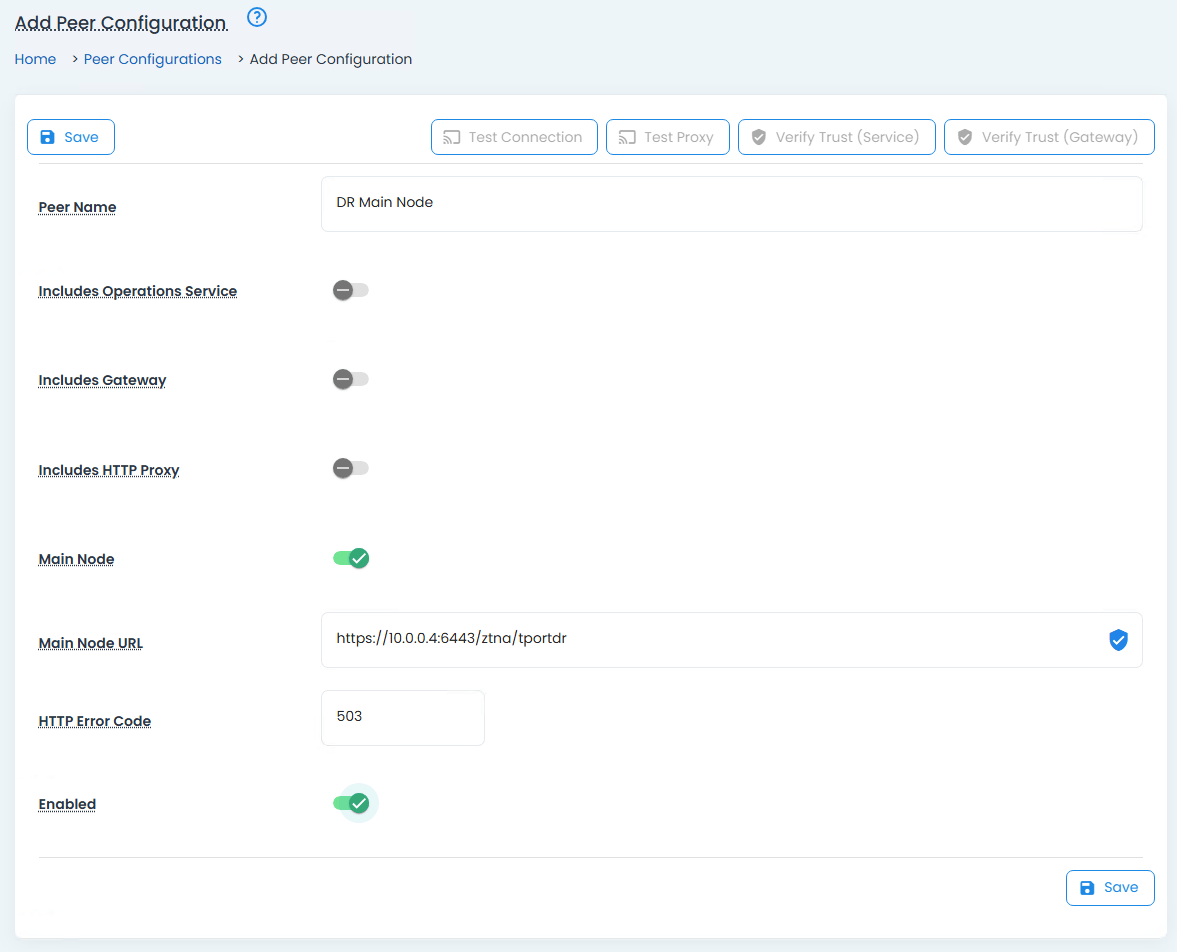
Use the URL of the primary 12Port server node as the Main Node URL. If you are using a self-signed certificate, make sure to click the Verify Trust button on the right side of this field.