Submitting Action Requests
When a user attempts to perform an action and is first required to seek approval, they must submit a Request Action form. This Request Action form will be sent to Authorizers who will determine if the request should be approved or rejected.
Request Action Forms Submission
If an action is required to be approved, there will be a visual indicator like a "Request Access" message on the action that will generate this request action form for the user.
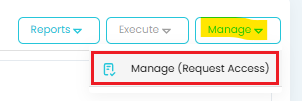
To submit a Request Action form:
- Select the action that will present the Request Action form, meaning it is included in a Request Selector configuration.
-
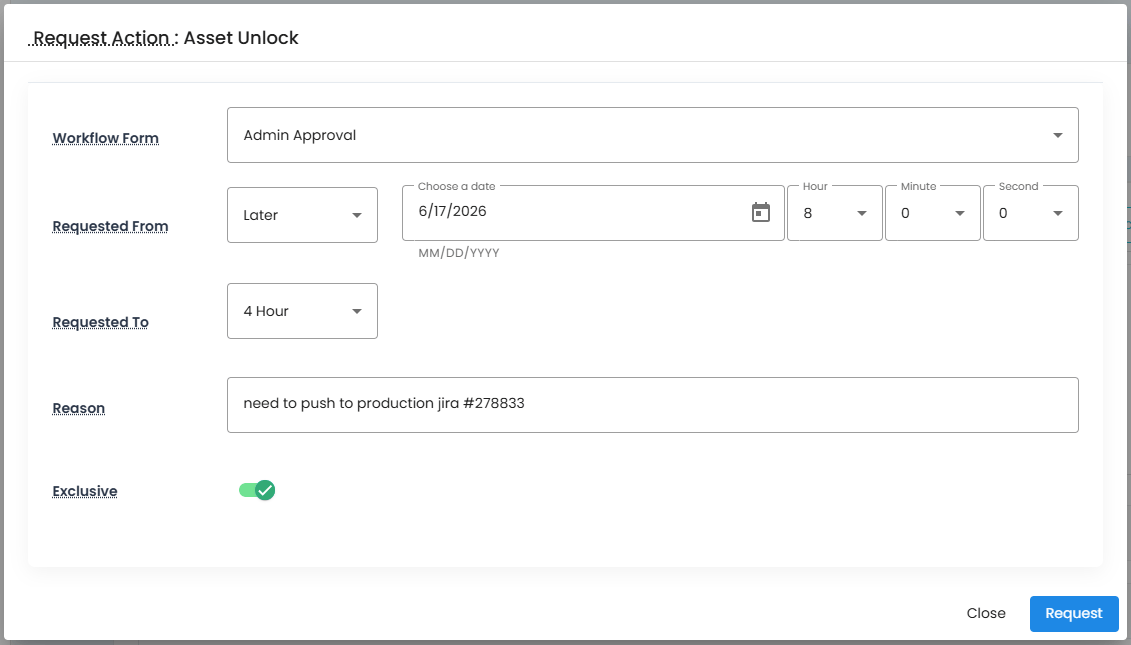
Click on the parameter name for details about each or follow the guidance provided here:
- Request Form: Select the request form that will determine the approval process. If only one is available, that will be the default form.
- Requested From: Determines the time when the approved access to the action is requested to begin.
- Now: When selected, the requested action will become available once approved.
- Later: When selected, use the Date and Time picker to select a future time for when the action will become available, pending final approval.
- Requested To: Determines the time when the approved access to the action is requested to complete. Select one of the Duration values provided in the dropdown (i.e. 1 Hour, 4 Hours, 12 Hours, etc). If required and available, select the
Customoption to define a custom Requested To end date and time. - Reason: The requester can enter a message indicating a reason why there are making this request. This message can help Approvers determine if they should approve or reject the request.
- Exclusive: If Exclusive is set to Optional in the Request Selector configuration, Enable this option to restrict exclusive access to this action during the approved time period. Disable this option to not request exclusive access. If this parameter is set to Unavailable or Required in the Request Selector configuration, then it will not be visible on this form.
-
Click the Request button to submit your request.
After the form has been submitted, you can monitor its status from your My Requests Page located My Profile > My Requests or from the asset itself.
Bulk Request Action Forms Submission
From the Asset List page, users can submit workflow requests for multiple assets at the same time. Select one or more assets, then select an available action from the Actions menu:
- Request Unlock: Opens the Mass Request Form to submit a request unlock form for all selected assets.
- Request Access: Opens the Mass Request Form to submit a request access form for all selected assets.
- Complete Requests: Completes approved workflows for all selected assets. Only the requester who submitted the now-approved workflows can perform this operation successfully.
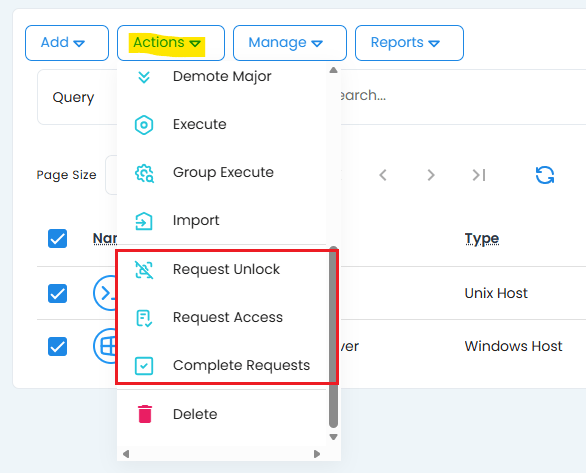
To submit a bulk Request Action form:
- From the Asset List page, select one or more assets.
- From the Actions menu, select Request Unlock or Request Access.
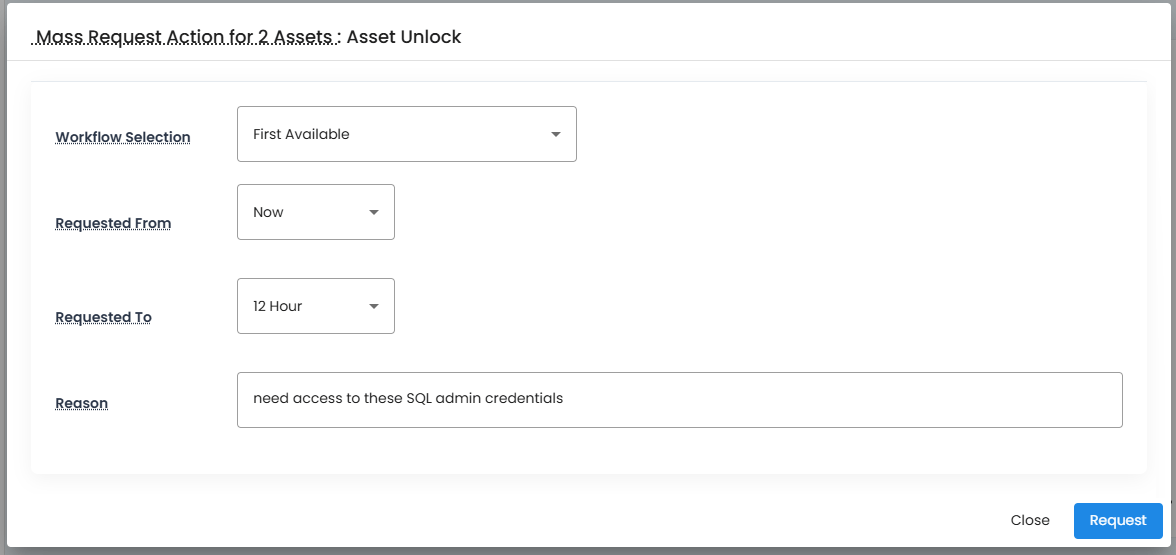
- Click on the parameter name for details about each or follow the guidance provided here:
- Workflow Selection: Determines how the workflow form is selected for each asset.
- First Available: The software selects the first available workflow selector assigned to the requester for each asset. This allows requests to be submitted when the available workflow forms or configurations differ between the selected assets.
- Select: Displays the Workflow Form parameter, which allows the requester to select a workflow form by name. The selected workflow form must be available for all selected assets. If there is no workflow form common to all selected assets, the dropdown will be empty and the mass request cannot be submitted. In this case, consider using the First Available option to allow the software to select an available workflow selector for each asset. The selected workflow form is submitted for each asset in the mass request operation.
- Requested From: Determines the time when the approved access to the action is requested to begin.
- Now: When selected, the requested action will become available once approved.
- Later: When selected, use the Date and Time picker to select a future time for when the action will become available, pending final approval.
- Requested To: Determines the time when the approved access to the action is requested to complete. Select one of the Duration values provided in the dropdown (i.e. 1 Hour, 4 Hours, 12 Hours, etc). If required and available, select the Custom option to define a custom Requested To end date and time.
- Reason: Enter a reason for the request. This message can help Approvers determine if they should approve or reject the request.
- Workflow Selection: Determines how the workflow form is selected for each asset.
- Click the Request button to submit the mass request.
After the form has been submitted, you can monitor their status from your My Requests Page located My Profile > My Requests or from the asset itself.